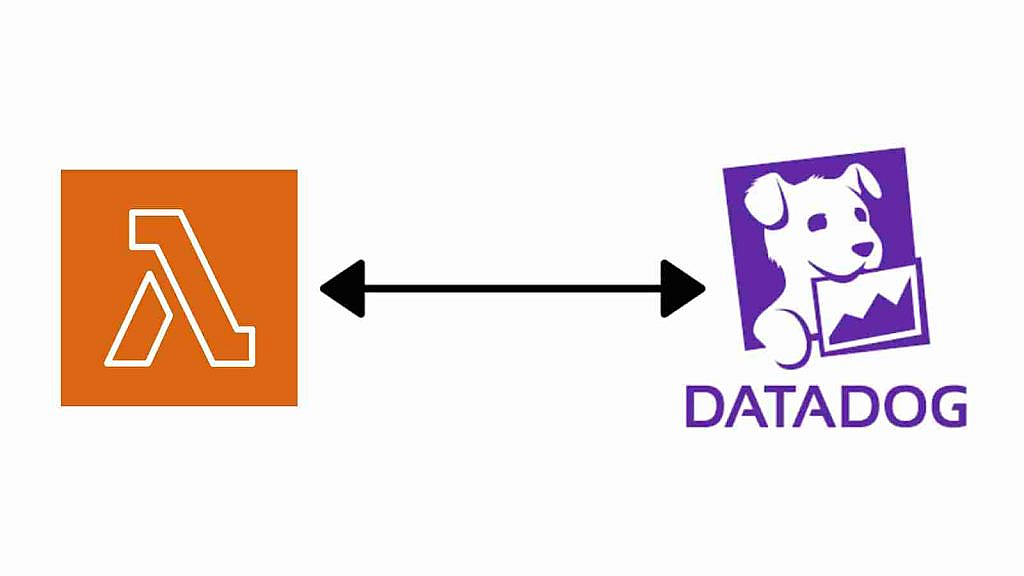
Why send custom metrics by AWS Lambda Function?
There are several reasons why you might choose to send metrics to DataDog from a AWS Lambda function instead of using an agent installed on an EC2 machine:
- Simplicity: Using a Lambda function to send metrics to DataDog can be simpler than installing and configuring an agent on an EC2 machine. You can deploy and manage your Lambda function using the AWS Management Console or the AWS CLI, and you don’t have to worry about setting up and maintaining a separate EC2 instance.
- Cost: Running a Lambda function is generally less expensive than running an EC2 instance, especially if you only need to send metrics occasionally. With Lambda, you only pay for the computing time that you use, so you can save money by only running your function when you need to send metrics.
- Flexibility: A Lambda function can be triggered by a variety of different events, such as an HTTP request, a change in an S3 bucket, or a message on an Amazon SNS topic. This makes it easy to send metrics to DataDog in response to specific events or at regular intervals. An EC2 instance, on the other hand, would require additional configuration to be triggered in the same way.
That being said, there are also cases where it might make more sense to use an agent installed on an EC2 machine to send metrics to DataDog. For example, if you have a large number of metrics to send or if you need to send metrics in real-time, using an agent might be more efficient. It’s important to consider your specific needs and choose the approach that makes the most sense for your use case.
In my case, I have to send some custom metrics which are collected from some service every 12 hour and there is no DataDog agent installed in any EC2 machine there, so I tried to think what would be the best solution to do that with minumie cost.
How to start?
To send custom metrics to DataDog from an AWS Lambda function, you will need to do the following:
- Install the DataDog Python library using
pip. You can do this by adding the following line to yourrequirements.txtfile:
datadog
- Import the
datadoglibrary in your Lambda function.
import datadog
- Initialize the DataDog client by providing your API key and app key. You can find these keys in your DataDog account settings.
datadog.initialize(api_key='YOUR_API_KEY', app_key='YOUR_API_KEY')
- Use the
datadog.statsd.gauge()function to send a custom metric to DataDog. This function takes three arguments: the name of the metric, the value of the metric, and a list of tags (optional).
datadog.statsd.gauge('my_metric', 42, tags=['tag1:value1', 'tag2:value2'])
- If you want to send multiple metrics at once, you can use the
datadog.statsd.batch()function. This function takes a list of metric names and values, and a list of tags (optional).
metrics = [
    {
        'metric': 'my_metric1',
        'points': (int(time.time()), 42),
        'tags': ['tag1:value1', 'tag2:value2'],
    },
    {
        'metric': 'my_metric2',
        'points': (int(time.time()), 23),
        'tags': ['tag1:value1', 'tag2:value2'],
    },
]
datadog.statsd.batch(metrics)
That’s it! Your custom metrics should now be visible in your DataDog account.
Consider securing your APP and API keys
It is generally considered a best practice to avoid hardcoding sensitive information such as API keys and app keys in your code. Instead, you should use environment variables to store this information and retrieve it at runtime. This way, you can keep your sensitive information out of version control and make it easier to deploy your code to different environments (e.g. staging, production) without changing the code itself.
To use environment variables in an AWS Lambda function, you can do the following:
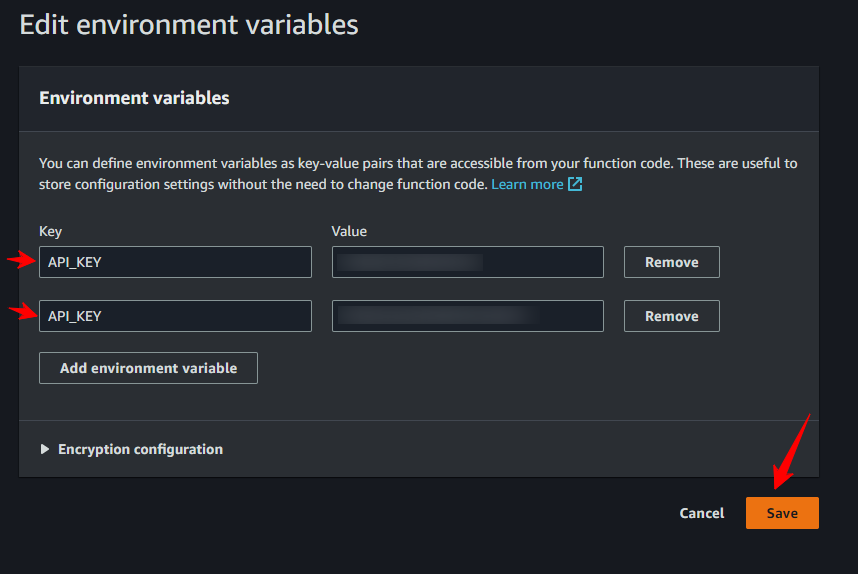
- Create a new environment variable in the AWS Lambda console by going to the “Configuration” tab of your function and clicking the “Edit” button in the “Environment variables” section.
- In your Lambda function code, use the
osmodule to retrieve the value of the environment variable. For example:
import os

api_key = os.environ['API_KEY']
app_key = os.environ['APP_KEY']
You can also use a tool like AWS Systems Manager Parameter Store to store and retrieve your environment variables. This can be especially useful if you have many Lambda functions or other resources that need access to the same environment variables.
It’s also a good idea to use different API keys and app keys for different environments (e.g. staging, production) to make it easier to track and troubleshoot issues.
Automate Deployment with AWS CodePipeline
Here you are how you can use AWS CodePipeline to automate the deployment of your AWS Lambda function:
- First, you will need to set up a code repository where your Lambda function code is stored. You can use a code repository hosted on AWS CodeCommit, or you can use a code repository hosted on a third-party service like GitHub or Bitbucket.
- Next, create a new AWS CodePipeline pipeline in the AWS Management Console. On the “Source” step, choose the code repository where your Lambda function code is stored and specify the branch that you want to use for automatic deployments (e.g.
master). - On the “Build” step, you can either choose “Skip build” if you don’t need to build or test your code, or you can choose “Create a new build project” to create a new AWS CodeBuild project to build and test your code. If you choose to create a new build project, you will need to provide a build specification (e.g. a
buildspec.ymlfile) that describes how to build and test your code. - On the “Deploy” step, choose “AWS Lambda” as the deployment provider and specify the name of your Lambda function. You can also specify any additional deployment options, such as whether to enable automatic rollback if the deployment fails.
- Finally, review your pipeline configuration and click “Create pipeline” to create the pipeline.
Once your pipeline is set up, CodePipeline will automatically deploy your Lambda function every time you push a change to the specified branch in your code repository. You can view the progress of your deployments and any deployment errors in the CodePipeline console.
That’s it! You should now have a fully automated pipeline for deploying your Lambda function.
Alternative automation options
There are several ways to automate the deployment of your AWS Lambda function, depending on your needs and preferences. Here are a few options:
- AWS CodePipeline: This is a fully managed continuous delivery service that can build, test, and deploy your code every time you make a change to your code repository. You can set up a CodePipeline pipeline to automatically deploy your code to Lambda whenever you push a change to a specific branch in your code repository (e.g.
master). - AWS CodeBuild: This is a fully managed build service that can build, test, and package your code. You can use CodeBuild in combination with other tools (e.g. AWS CloudFormation, AWS CodePipeline) to automate the deployment of your Lambda function.
- AWS CLI: You can use the AWS command-line interface (CLI) to automate the deployment of your Lambda function using scripts. For example, you can use the
aws lambda update-function-codecommand to update the code of an existing Lambda function, or theaws lambda create-functioncommand to create a new function. - Custom scripts: You can also write your own custom scripts to automate the deployment of your Lambda function. For example, you could use a tool like
maketo build and deploy your function, or you could use a more fully-featured build tool like Jenkins to automate the entire build and deployment process.
No matter which approaches you choose, it’s important to make sure that you have a reliable and repeatable process for deploying your code to ensure that your function is always up-to-date and running correctly.


